Companies 2025")
 Companies in Asia/Middle East")
 Europe-Based Firms You Can Trust")


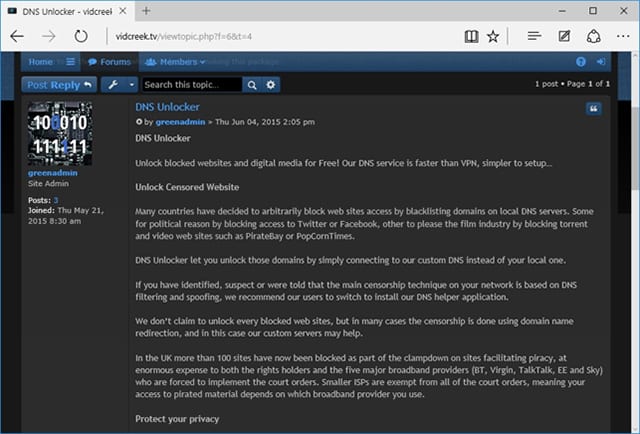
The controversial story of DNS Unlocker software got a kick-off into the public realm with a thread created on VIDCreek.tv online sharing community. In early June 2015, the site admin announced a project purportedly intended for bypassing filters which restrict user access to a variety of Internet resources based on the visitors’ DNS servers. Considering the free-of-charge operational mode, this startup initially seemed like a great opportunity for people living in some countries to surf the web without limits and fully enjoy services like NetFlix, Spotify, ESPN, CBS, HBO, Crackle, ITV and BBC iPlayer, all of which would otherwise be blocked. In the long run, however, customers and IT experts came to realize that this was in fact a well-orchestrated campaign aiming at unauthorized ads serving on a large scale. The predicament that DNS Unlocker clients end up in is, obviously, a lot weightier than the advantage of using custom servers provided by the product.
As opposed to the majority of regular software that can be encountered on the web, DNS Unlocker is entirely bundle-dependent as far as propagation goes. Its official page on the Internet does not even have a button to download the program, which is a likely indication of underhand spreading vectors. This potentially unwanted applet gets promotional aid from installers of some third-party shareware or freeware, where it poses as a special offer. Ironically, the troublesome drive-by is an opt-out: all it takes to avoid it is remove a checkmark from a box that says “I agree to the EULA and Privacy Policy, and consent to install DNS Unlocker” on one of the several setup dialogs for the affiliated programs such as SRecorder and Bazooka. In most reported cases, installation of the adware has been an unexpected occurrence, which means that people aren’t very fond of getting into technicalities.

The way DNS Unlocker emulates online connection attributes, as promised, is a double-edged sword. On the one hand, the program does indeed make it look like the requests are originating from an allowed valid server so that certain sites can be accessed despite the blocking. On the other, the fact that it modifies one’s Internet Protocol properties enables it to be in full control of the content presented to the client. This is the instrument leveraged for injecting sponsored information into arbitrary places on visited web pages.
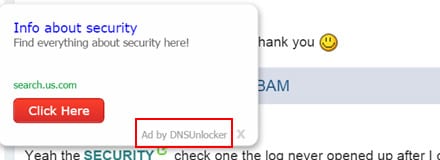
As a result of this interference, the victim will keep stumbling upon automatically generated text ads, bogus software update reminders, comparison shopping elements, banners, as well as interstitial and transitional ads. The volume of this unsanctioned advertising tends to get so big that websites will appear difficult to view and scroll through, with irritating popups and other redundant items that say “Ad by DNSUnlocker” emerging at random. Going back to the normal web browsing routine under these circumstances isn’t easy. It’s not only the harmful software that needs to be uninstalled. In fact, remedying the system is also a matter of reconfiguring the Local Area Connection as well as conducting some additional in-depth cleanup. Most questions that may occur in the course of this troubleshooting are answered below. It’s a do-it-yourself guide to completely solve the DNS Unlocker adware problem.
Use reliable security software to detect and remove DNS Unlocker
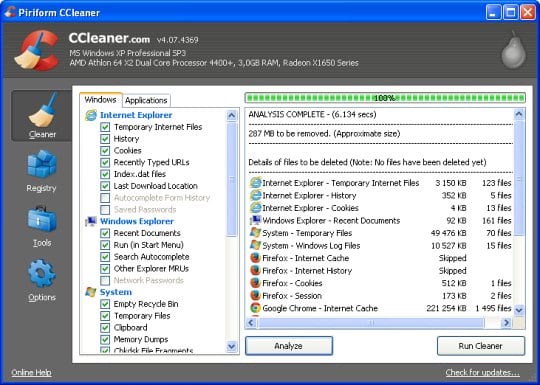
CCleaner by Piriform is an efficient solution designed to automatically uninstall persistent malware such as DNS Unlocker and cease the ads injection activity.
- Download free or paid version of CCleaner by Piriform and save it to your Desktop. Install and run the software.
- Click on the Cleaner button in the left-hand navigation menu, select Windows and Applications tabs in turn, and click Analyze option for each. Once the analysis has been completed, click Run Cleaner .
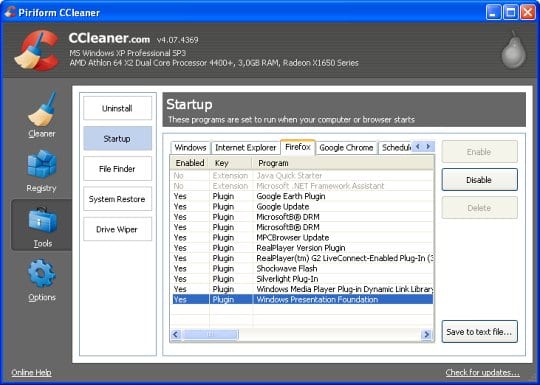
- Go to Tools in the navigation menu and select the Startup option. Search entries under all available tabs (‘Windows’ through ‘Context Menu’) for dubious items that might be related to the DNS Unlocker adware (DNS Unlocker version 1.3 , VIDCreek or similar) and choose Disable and Delete for that entry.
- You can also use the Uninstall functionality under Tools to completely get rid of programs that cannot be deleted manually.
Uninstall the adware from Control Panel
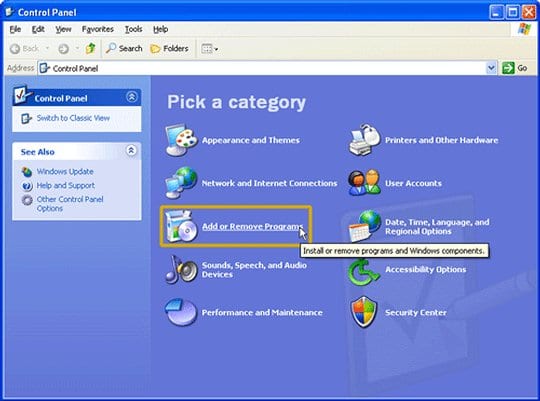
- On Windows XP: go to Start –> Control Panel –> Add/Remove Programs

- On Windows Vista / 7 / 10: go to Start (right-click Start menu button on Windows 10) –> Control Panel –> Uninstall a Program
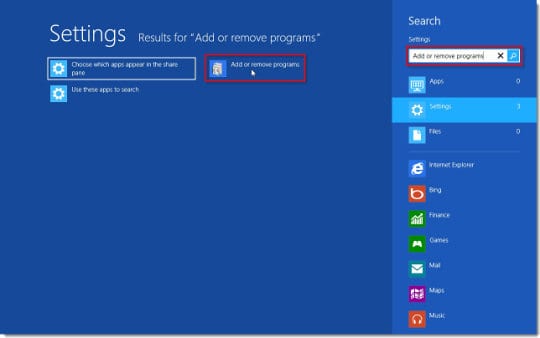
- On Windows 8: click on Search icon –> type in ‘add or remove‘ (this will suffice) –> select Add or remove programs
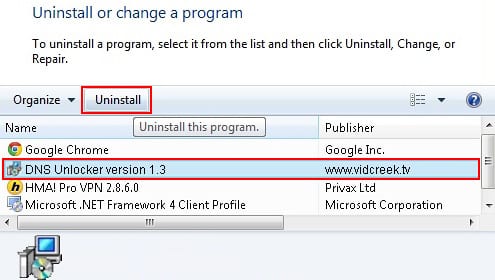
- When the screen for program removal appears, look for DNS Unlocker or DNS Unlocker version 1.3 entry
- If located on the list, the object should be uninstalled immediately.
Toggle LAN settings
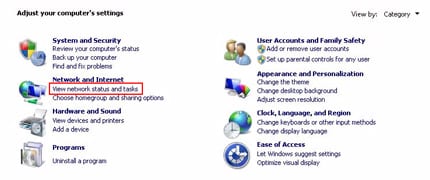
- When on Control Panel, select View network status and tasks
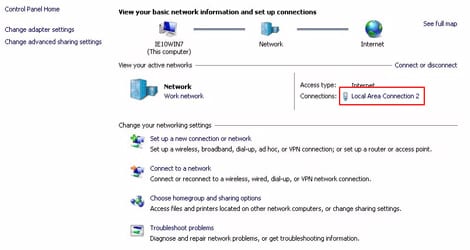
- Click on the Local Area Connection option
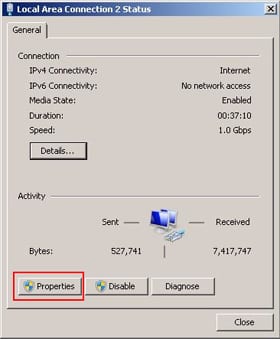
- Proceed to Properties
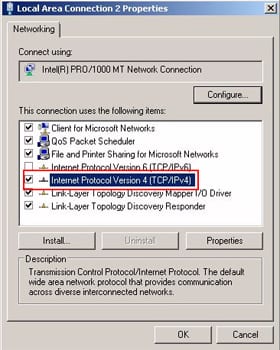
- Select Internet Protocol Version 4 (TCP/IPv4) and click Properties
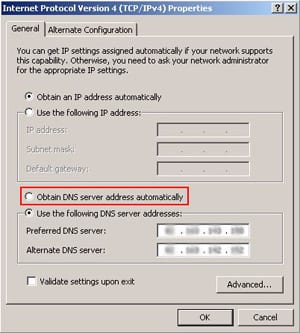
- Activate the radio button to Obtain DNS server address automatically
- Click OK to save the changes.
Reset the web browser
Ads by DNS Unlocker removal from Mozilla Firefox
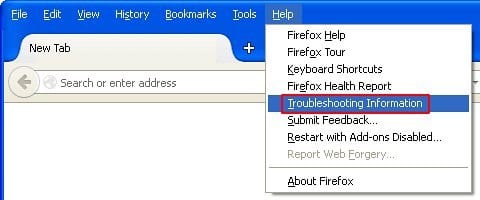
- Go to Tools and select Troubleshooting Information in the drop-down list
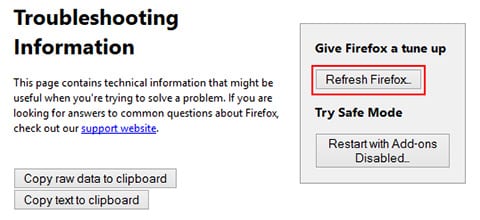
- Click Refresh Firefox and follow further prompts to complete the process of restoring the original defaults
Ads by DNS Unlocker removal from Google Chrome
- In the top right of your Chrome window, click on the Chrome menu icon
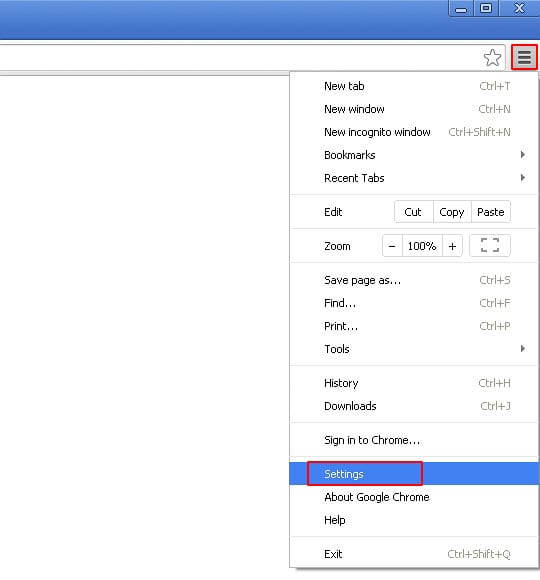
- Select Settings in the drop-down menu
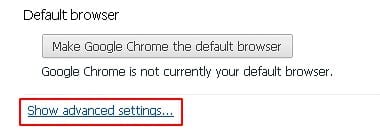
- Select Show advanced settings
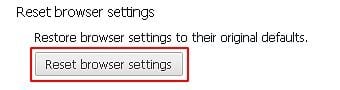
- Click the Reset browser settings button

- Peruse the alert regarding the transaction and click Reset (as shown) if you are sure
Ads by DNS Unlocker removal from Internet Explorer

- Go to Tools and choose Internet Options
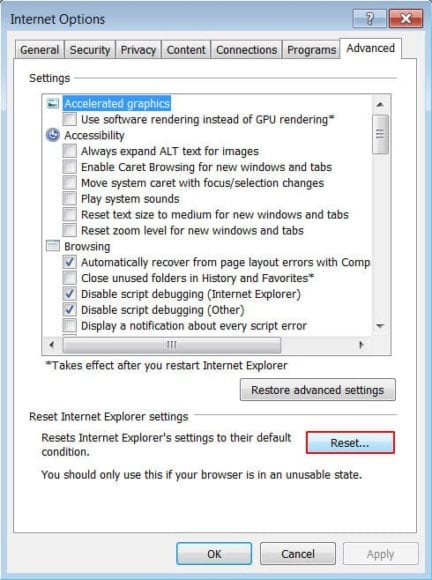
- Click on the Advanced tab and select Reset
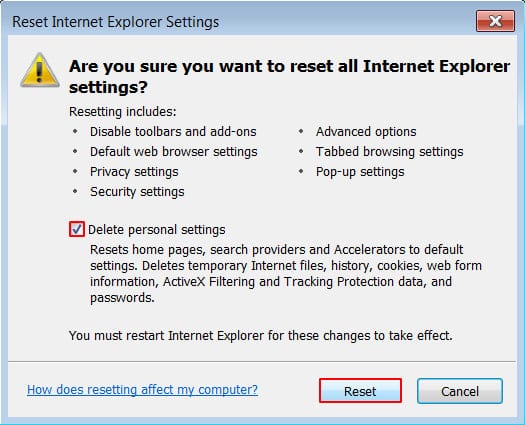
- Examine the contents of the dialog and click Reset to finish the procedure
Double-check
Scan your system with Bitdefender, the Privacy PC Gold Award winner in Internet security suites category, to make sure all registry entries and junk files added by the DNS Unlocker adware have been cleaned up. This step will help you ascertain that no remainders of the infection are still there in case you missed something or if the adware has restored some of its components after manual removal.